Try to film using screen capture rather than application capture.
These steps can be accessed in the following sections, depending on which you need:
For Applications
-
Myself and an Application
-
Only an Application
- Add Button
Selecting a Camera and Microphone
Panopto Express will automatically select your built-in camera and microphone. To change these options, select the "Audio" and/or "Video" option from the top navigation

Selecting an Application
Make sure the application you want to record is open, first.
Select the "Screens and Apps" icon from the top toolbar:

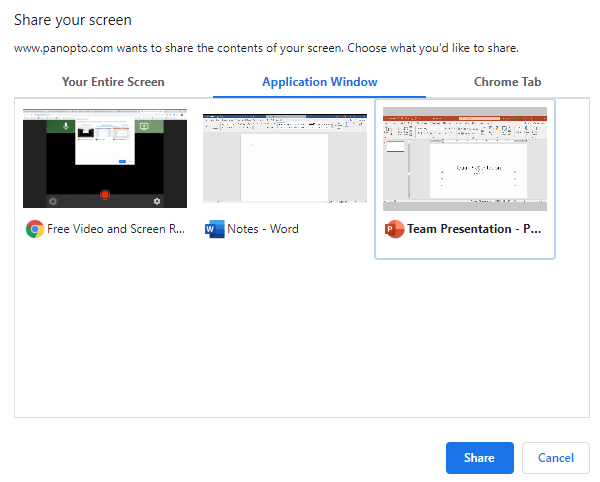
On the "Share your screen" menu that appears, select the tab "Application Window." This will display icons for each of the applications you have open on your computer. Select the application you want to share, and then select "Share."
Arranging Your Video Sources
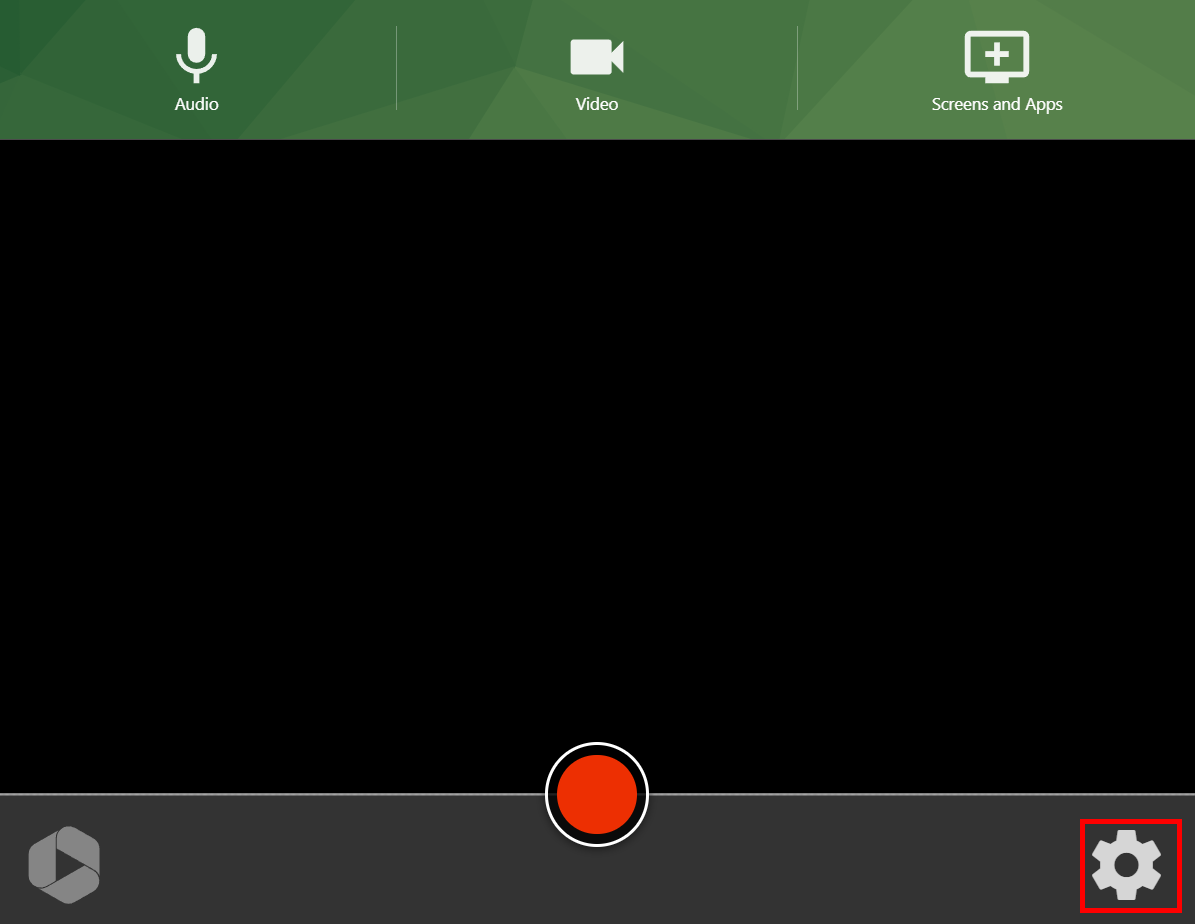
Select the gear icon from the lower-left corner of the recorder to open the Settings menu:
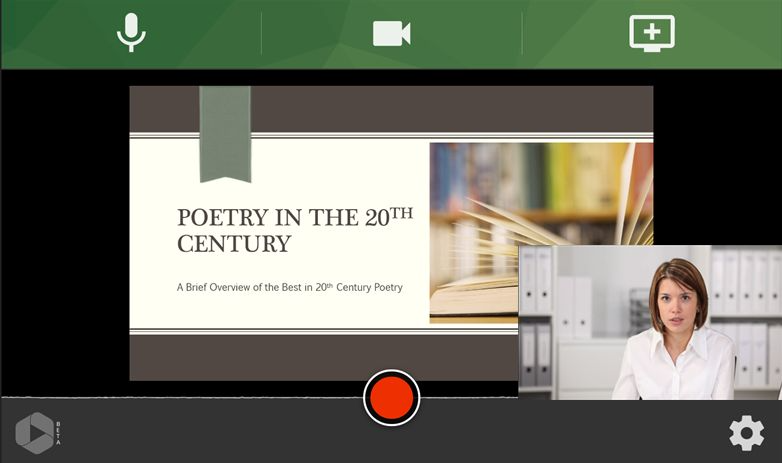
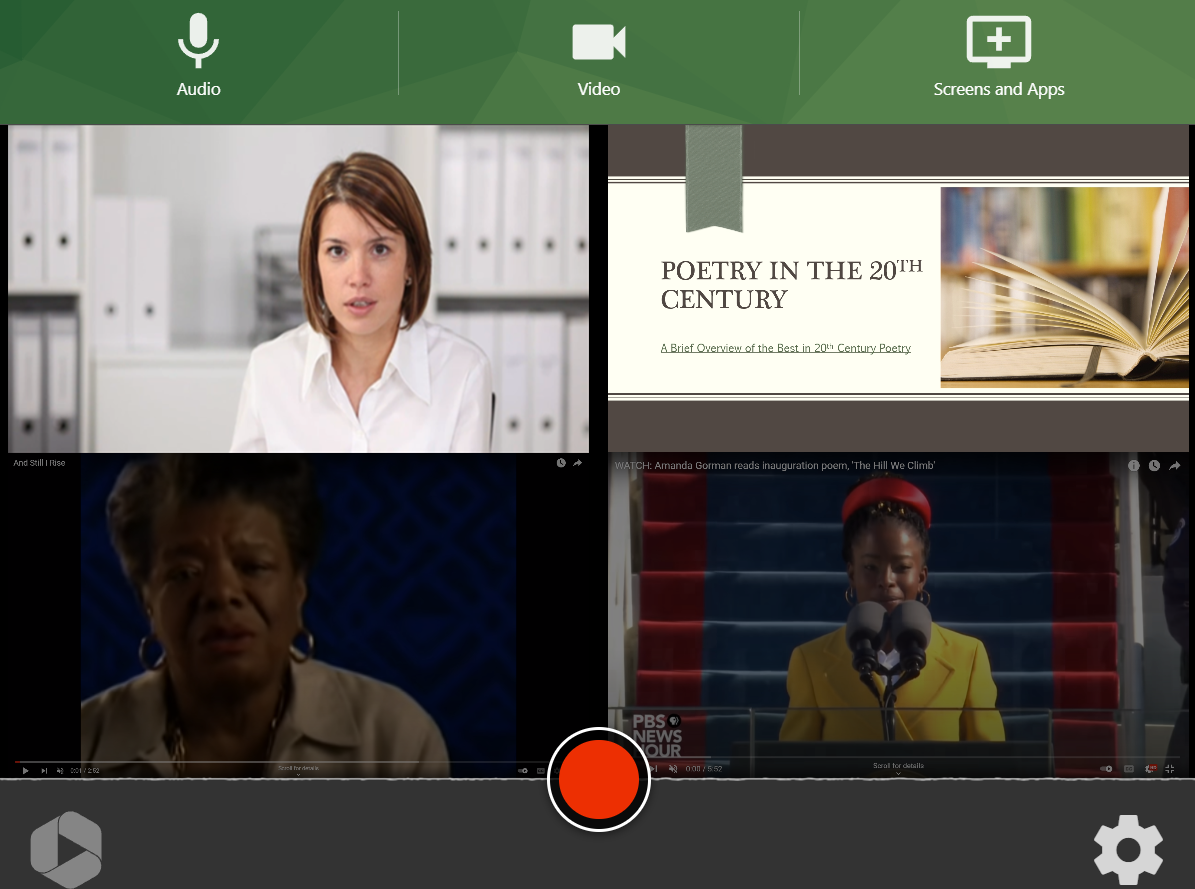
In the section "Video Layout," you can select one of the following options:
The secondary video is featured, and the primary video will appear in the lower right-hand corner:
This will show all of the streams tiled into one video. The tiles will automatically resize, depending on how many streams were recorded:
When you're ready to record, select the record button:

When you're done recording, select the stop button:

Turn Off Your Camera
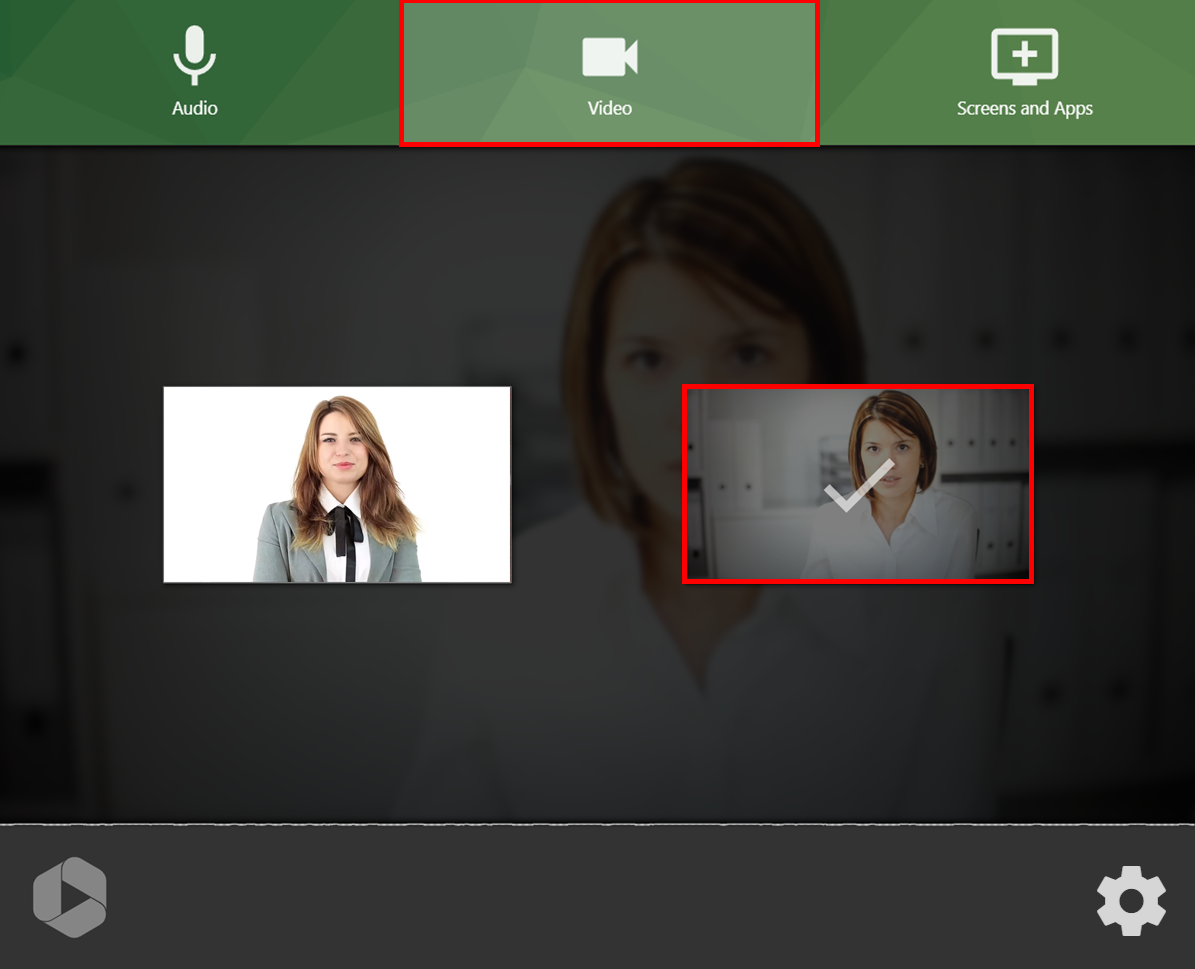
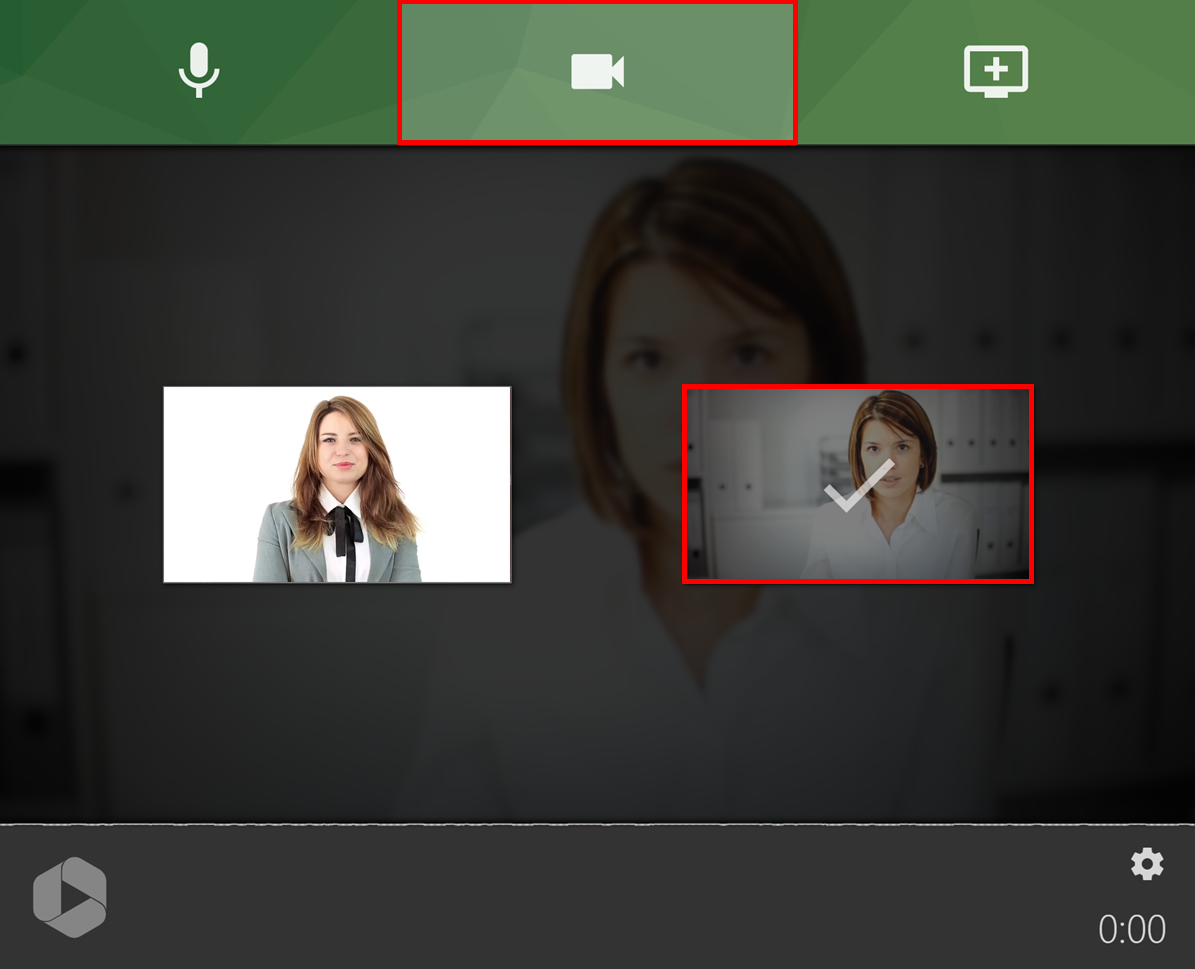
Select the "Video" icon from the top toolbar. Each camera connected to your computer will appear as a button in the preview area. The camera being used will appear with a check mark over it. Deselect the camera buttons that include a checkmark:
Select Your Screen
Select the "Screens and Apps" icon from the top toolbar:
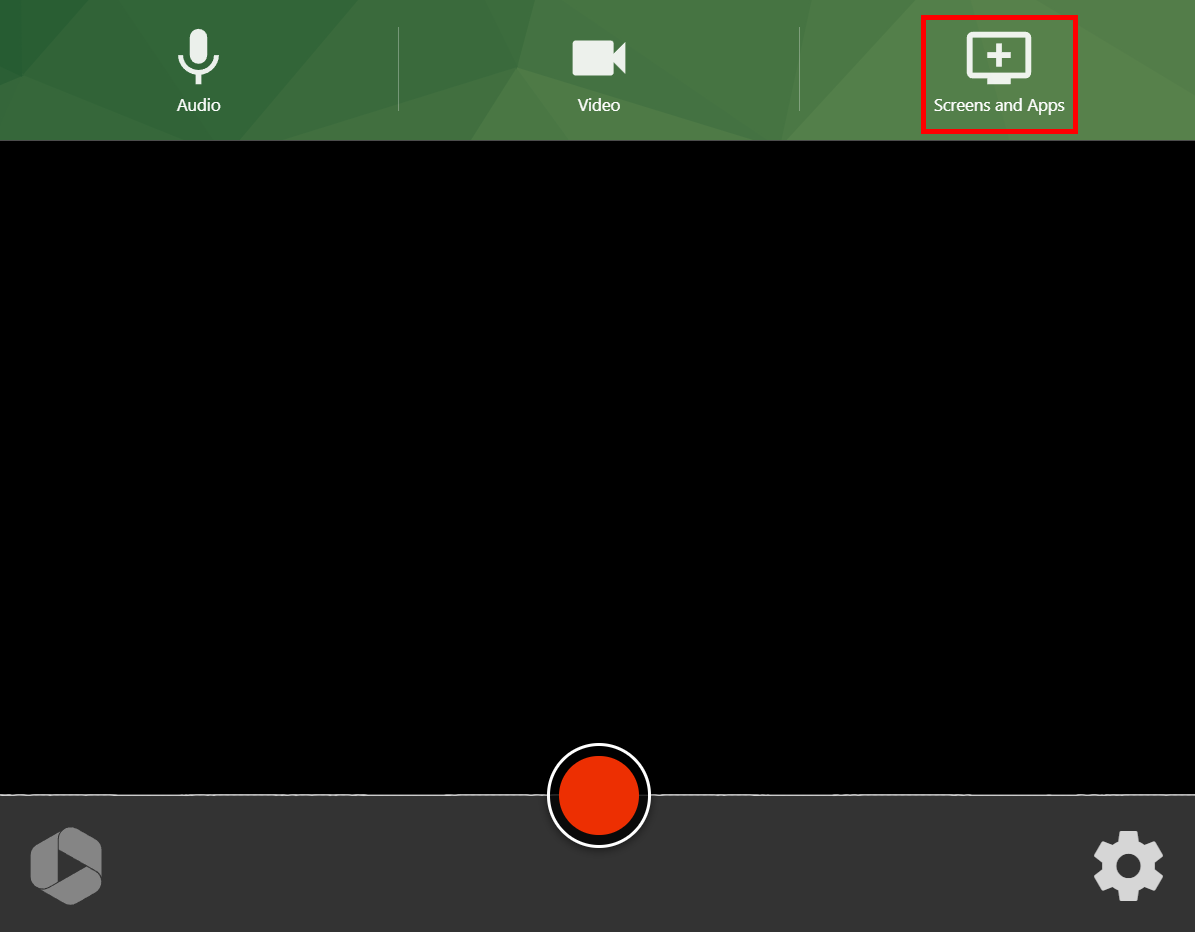
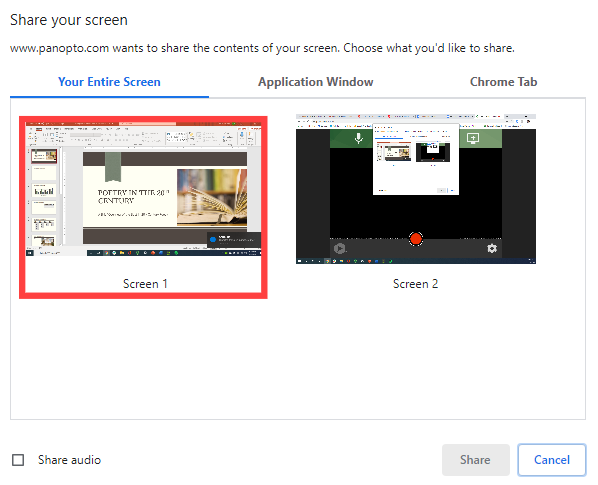
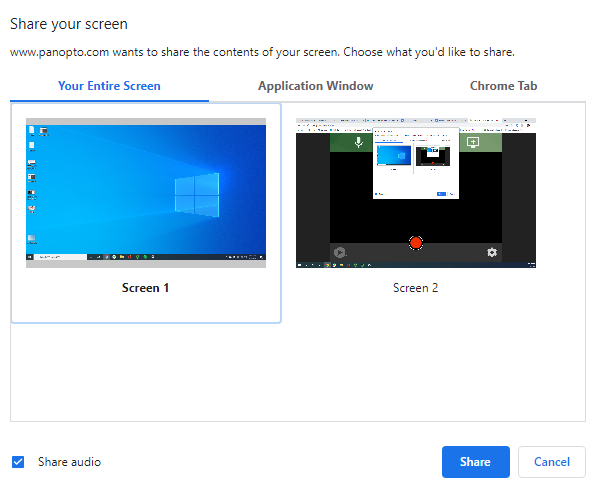
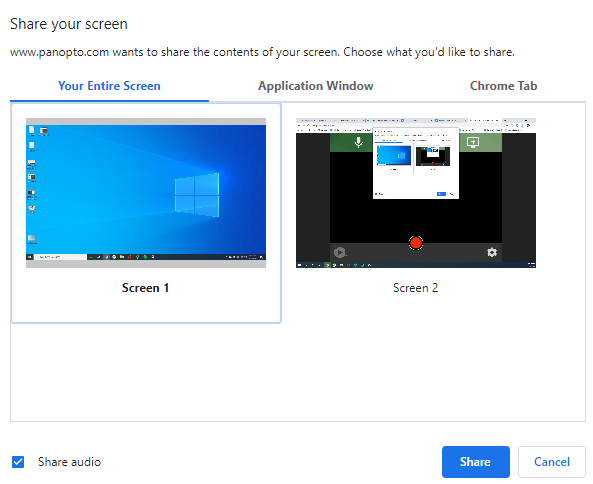
The “Share your screen” menu will appear. To select your screen, select “Your Entire Screen,” select the screen you want to present, and then select “Share.” If you want to share your screen’s audio, select the checkbox next to “Share audio.” Note: in this example image, the user has two screens: a laptop screen and an additional monitor. If you only have one screen, or share the screen you are using Panopto Express on, it will create an endless, mirrored effect until you minimize the Express recorder. Your screen will still be recorded in this case.
When you're ready to record, select the record button:

When you're done recording, select the stop button:

For PowerPoint Capture
-
Myself and a PowerPoint
-
Only the PowerPoint
- Add Button
Selecting a Camera and a Microphone
Panopto Express will automatically select your built-in camera and microphone. To change these options, select the "Audio" and/or "Video" option from the top navigation:

Select the Screen.
Select the "Screens and Apps" icon:

The “Share your screen” menu will appear. To select your screen, select “Your Entire Screen,” select the screen that has your PowerPoint Presentation, and select it. and then select “Share.” If your presentation has audio, select the checkbox next to “Share audio.” Note: in this example image, the user has two screens: a laptop screen and an additional monitor. If you only have one screen, or share the screen you are using Panopto Express on, it will create an endless, mirrored effect until you minimize the Express recorder. Your screen will still be recorded in this case.
Delete
Arranging Your Video Sources
Select the gear icon from the lower-left corner of the recorder to open the Settings menu:

-
Picture-in-Picture
-
Tile
- Add Button


When you're ready to record, select the record button:

When you're done recording, select the stop button:

Then, visit I'm Done Recording!
Using Screen Capture
Turn Off Your Camera
Select the "Video" icon from the top toolbar. Each camera connected to your computer will appear as a button in the preview area. The camera being used will appear with a check mark over it. Deselect the camera buttons that include a checkmark:
Select the Screen
Select the "Screens and Apps" icon from the top toolbar:

The “Share your screen” menu will appear. To select your screen, select “Your Entire Screen,” select the screen you want to present, and then select “Share.” If you want to share your screen’s audio, select the checkbox next to “Share audio.” Note: in this example image, the user has two screens: a laptop screen and an additional monitor. If you only have one screen, or share the screen you are using Panopto Express on, it will create an endless, mirrored effect until you minimize the Express recorder. Your screen will still be recorded in this case.
Delete
When you're ready to record, select the record button:

When you're done recording, select the stop button:

Then, visit I'm Done Recording!
DeleteUsing Application Capture
Turn Off Your Camera
Select the "Video" icon from the top toolbar. Each camera connected to your computer will appear as a button in the preview area. The camera being used will appear with a check mark over it. Deselect the camera buttons that include a checkmark:

Select the PowerPoint Application
Before proceeding with recording, open the PowerPoint presentation and place it in slideshow mode.
Using your keyboard, press the Alt (Windows) or Command (Mac) key and use the Tab key to see and tab through the open applications, back to where Panopto Express is open.
Select the "Screens and Apps" icon from the top toolbar:

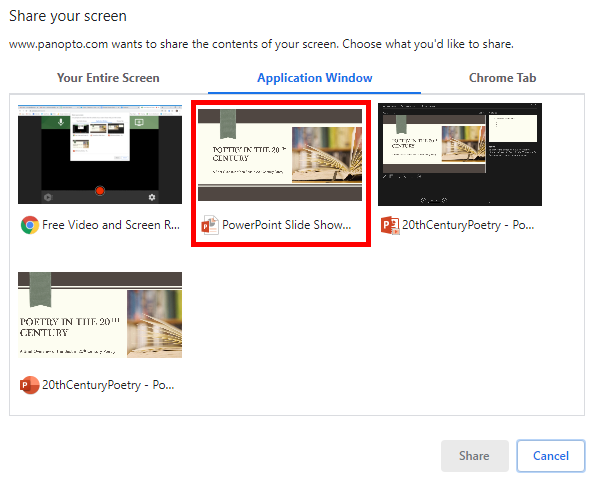
The “Share your screen” menu will appear. To select your screen, select “Application Window,” select the screen that has your PowerPoint Slide Show and then select “Share.”
You will be taken to the view of the slideshow again, but are not yet recording. To start recording or to make additional adjustments, press the Alt (Windows) or Command (Mac) key and use the Tab key on your keyboard to see and tab through the open applications, back to where Panopto Express is open.
DeleteWhen you're ready to record, select the record button:

When you're done recording, select the stop button:

Then, visit I'm Done Recording!
Delete